Lesson 4
More Assets
Filling out the rest of the assets we need.
A bit of organisation
So far, we’ve got our spr_clown sprite asset, our obj_clown object asset, our scr_init script asset and our Room1 room asset in the asset browser.
Since we’re about to add a game over room, and some fonts and stuff, I think it’s time to do a little organisational work so we’re not mixing all the assets together in one big blob.
Right click on an empty space in our Asset Browser and select Create Group. This will create a group that we can put stuff in to organise our assets. Name it “Play”.
Do the same thing three other times, calling the groups “Init”, “Global Assets” and “Game Over”.
Now drag our clown assets and Room1 into the “Play” group, and drag our scr_init script into our “Init” group. At this point, it should look roughly like this:
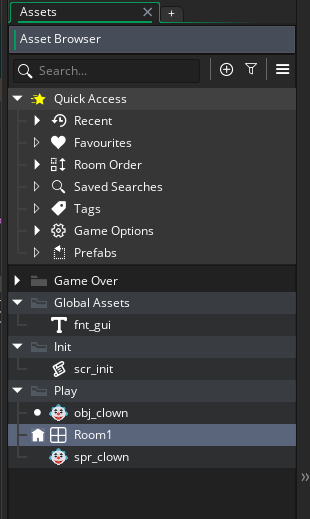
Organisation complete!
It might seem like a small thing, but staying organised is very important for game development. You’ll always end up with many more assets than you thought you would by the time you complete a project. In fact, a fully developed proper game can have thousands upon thousands of assets.
So getting into the habit of organising your stuff regularly and being disciplined with your approach to asset management is a life-saver in the long run.
The “play” room
Right now we have our Room1 room, but that name isn’t very descriptive, so let’s update it. Right click on the room asset in our Asset Browser, and select Rename from the context
menu, just like we did with our script.
Call it something like rm_play.
And while we’re at it, let’s get our play room properly set up.
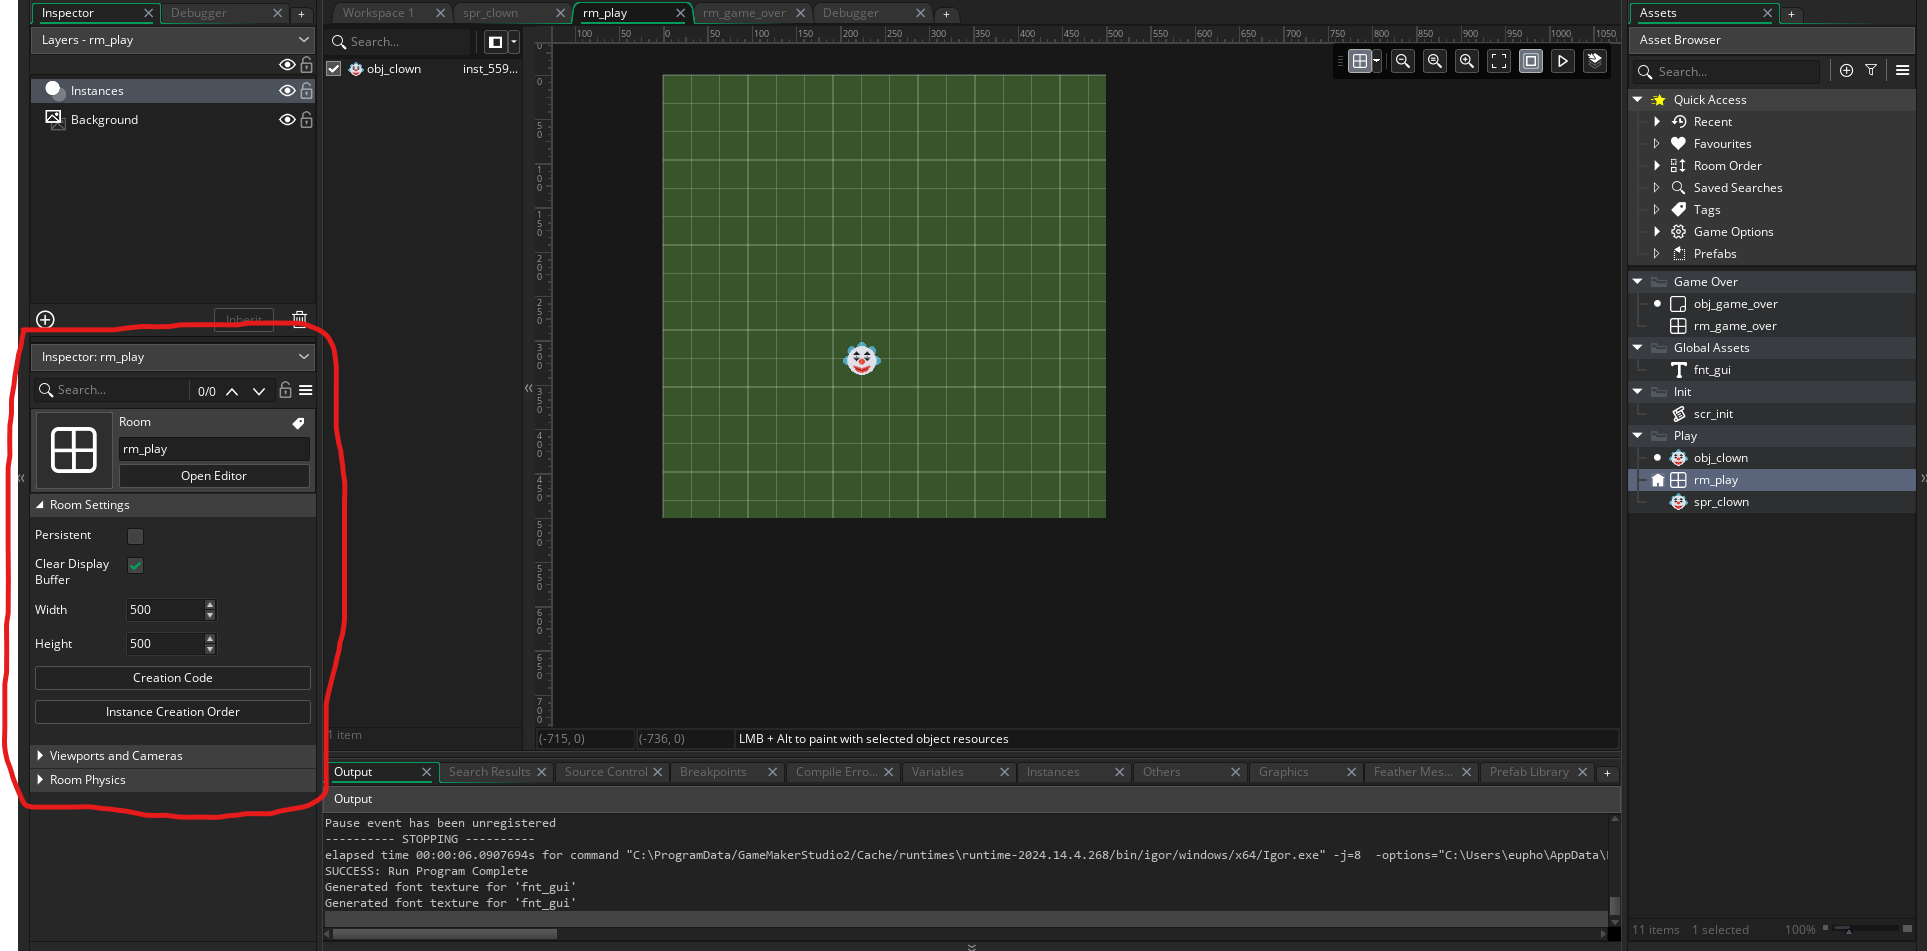
Double click on the newly renamed rm_play in our Asset Browser, opening our Room window. Click and drag our obj_clown to anywhere inside the grid section in the room (make
absolutely sure you are dragging in the object, not the sprite).
Now we’ll have an instance of the clown in the room when the game starts.
Let’s also resize the room and give it a nice background colour, instead of black, just for fun.
Have a look for the Inspector panel:
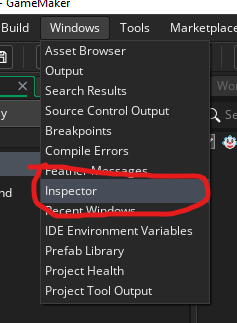
If you can’t find it, try clicking Window > Inspector on the menu bar:
Ensure that you have left clicked on the rm_play room asset in the Asset Browser, so the inspector is targeting the room.
We can see the width and height of the room in the Room Settings section:
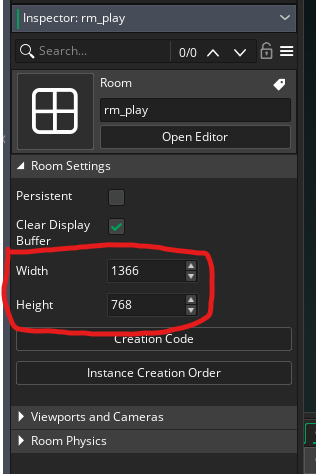
Change the width to 500 and the height to 500, so we have a nice even square room. Since we haven’t enabled any views or anything, the game window will also adopt the same size.
Now let’s change the background colour. Find the Layers panel, and click on the Background layer:
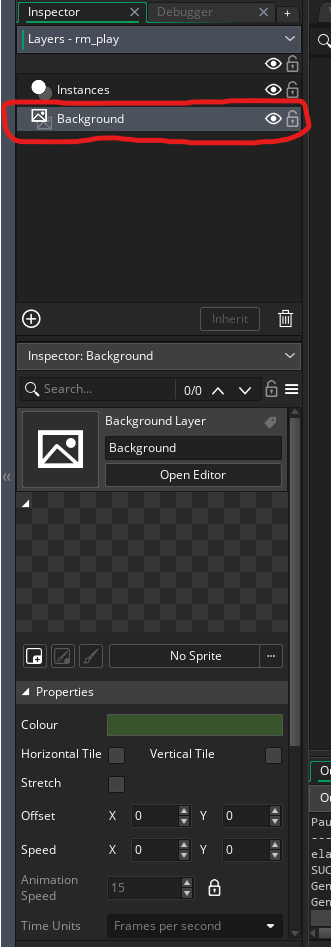
You should see that the Inspector panel switches to information about the Background layer. We can assign a sprite to the background, make it tile horizontally and/or vertically, all sorts of things from here, but for our purposes, you want to find the Colour setting.
Click on the colour beside it and pick a colour you like. I went with a nice darkish desaturated green (remember, our text is being drawn white, so a dark colour is better here).
Fancy fonts
Our next task is to create a font. Right click on our “Global Assets” group in the Asset Browser and select Create > Font.
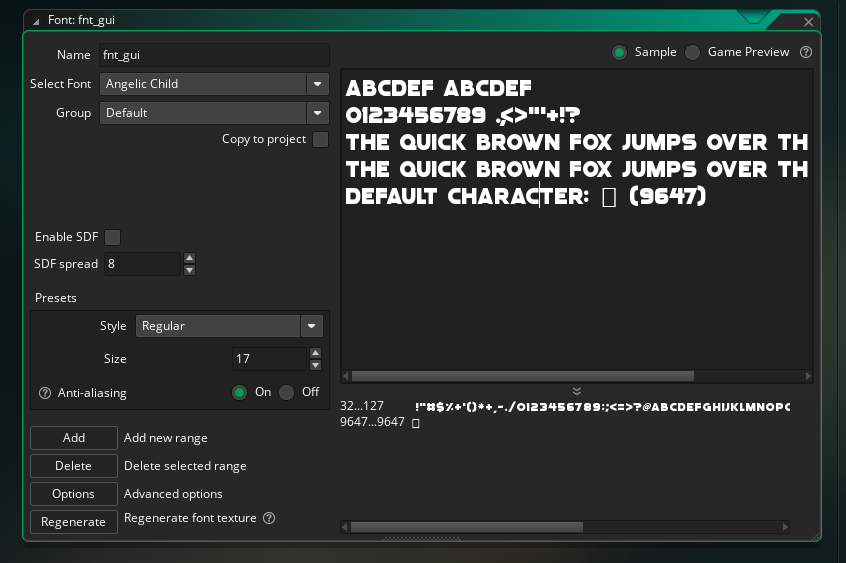
The Font window should pop up. We can name it in the top-left, so name it the same as the argument we put into our draw_set_font() call: fnt_gui.
After that select the font you want from the dropdown menu just below the name.
Adjust the sizing if you need to in the Size setting on the middle of the left-hand side.
GM stores fonts as literal images of each character (there are complicated reasons why) so we can’t just directly tune the size of our font via code (well, we kinda can, but it gets ugly fast), so we want to set the size to match what we want in game as much as possible.
Now the last bit of asset work is getting our Game Over stuff created.
A proper game end sendoff
Create an object in our “Game Over” group and call it obj_game_over.
Give the object three events: a Create Event, a Global Left Pressed Event and a Draw GUI Event. The only one we haven’t done before is the Global Left Pressed Event.
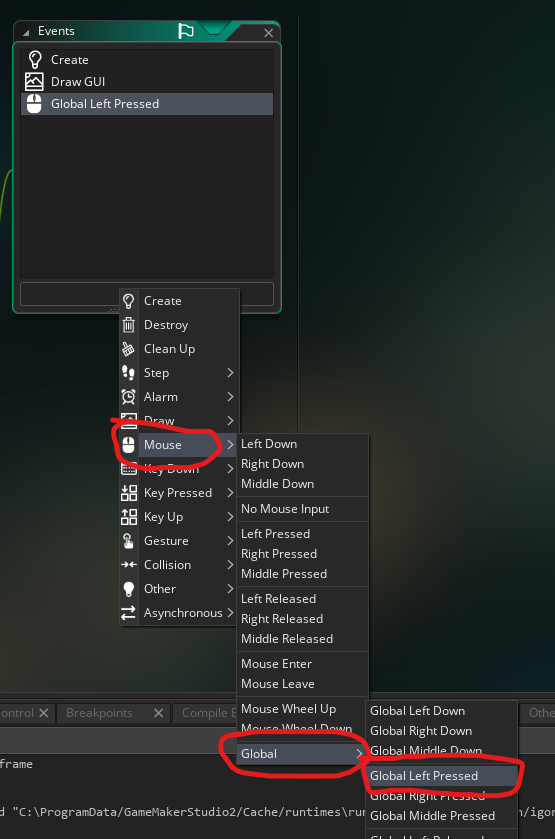
The big difference between the “normal” Left Pressed Event we added to our clown, and the Global Left Pressed Event we are adding here is that the Left Pressed Event requires the click or touch to be inside the collision mask of the object.
In contrast, the Global Left Pressed Event simply registers any left-click or touch anywhere in the game window.
We’ll use this to allow the player to play another round (essentially “Click anywhere to start again”).
Now we’ve got our events added, let’s open up the Create Event for our obj_game_over object, and add this code:
highscore_beaten = false;

if (global.points > global.max_points) {
	global.max_points = global.points;
	highscore_beaten = true;
}
This is where we determine if the player has beaten their high score. We are creating an instance variable (since we want to access this variable in other events) called highscore_beaten
and setting it to false.
Then we check if global.points is greater than global.max_points. If it is, we set global.max_points to global.points (updating our old high score to the new one) and then we set
highscore_beaten to true.
Let’s add the code to our Global Left Pressed Event now, so open that event and add this code:
global.points = 0;
room_goto(rm_play);
Pretty simple, when the user presses their left mouse button or taps the screen, we reset global.points back to 0, and send them back into our rm_play room with their old nemesis, the
clown.
Now we have the last bit of code we need to add to our obj_game_over object: The Draw GUI Event code. Open the event and enter this code:
draw_set_font(fnt_gui);
draw_set_halign(fa_center);
draw_set_valign(fa_middle);
draw_set_color(c_white);

var _str_game_over = "Game over!\n\n";
if (highscore_beaten) {
	_str_game_over += "You beat the high score!\n\n";
}
_str_game_over += "Your score is " + string(global.points) + "\n";
if (highscore_beaten) {
	_str_game_over += "New high score " + string(global.max_points);
}
else {
	_str_game_over += "High score is " + string(global.max_points);
}

draw_text(display_get_gui_width() * 0.5, display_get_gui_height() * 0.5, _str_game_over);

draw_set_valign(fa_bottom);

var _str_try_again = "Click or tap to try again.";
draw_text(display_get_gui_width() * 0.5, display_get_gui_height() - 5, _str_try_again);
Ok, that’s by far the most complicated code we’ve encountered. Or at least, it appears so because there’s a lot of it. But look closer and you’ll see the similarities to the clown’s Draw GUI Event.
First we are setting our draw settings via the draw_set_*() functions, just like in our clown object.
These functions set the draw settings globally for the game, so it’s important to remember to set them every time you go to draw some text. It’s extremely common for beginners to have their text being drawn offset, or the wrong colour, or with the wrong font, simply because they added some code in a completely different part of their game, and that code sets one of these functions.
And then there’s much wailing and gnashing of teeth for them as they try to figure out why the two seemingly unrelated chunks of code are affecting each other.
Then we are creating a local variable (_str_game_over) and assigning a string to it. Then we dynamically add more strings to it, in order to build our final string.
The big difference between the clown string code and this string code is that we are actually using if statements to build the string here, instead of directly adding the strings together.
We are using our instance variable highscore_beaten to make decisions about whether to add some flavour text if the user has beaten their previous high score.
Then we draw our text, but this time we do want it to draw in the center of the screen, so we set the x argument to display_get_gui_width() * 0.5 and we set the y argument to
display_get_gui_height() * 0.5.
And we want to draw our “Click or tap to try again” text at the bottom of the screen, just like our score in the clown object.
Room for one more thing
The very last thing we have to do is create our actual game end room. So create a room in the “Game Over” group (Right click: Create > Room).
Name the room rm_game_over. Click and drag our obj_game_over object into the room.
We’ll also want to set the size of this room to 500 x 500, and maybe pick a different colour for its background.
And that’s it, at this point, our game should be finished. The final step is to run it and see!